 Save
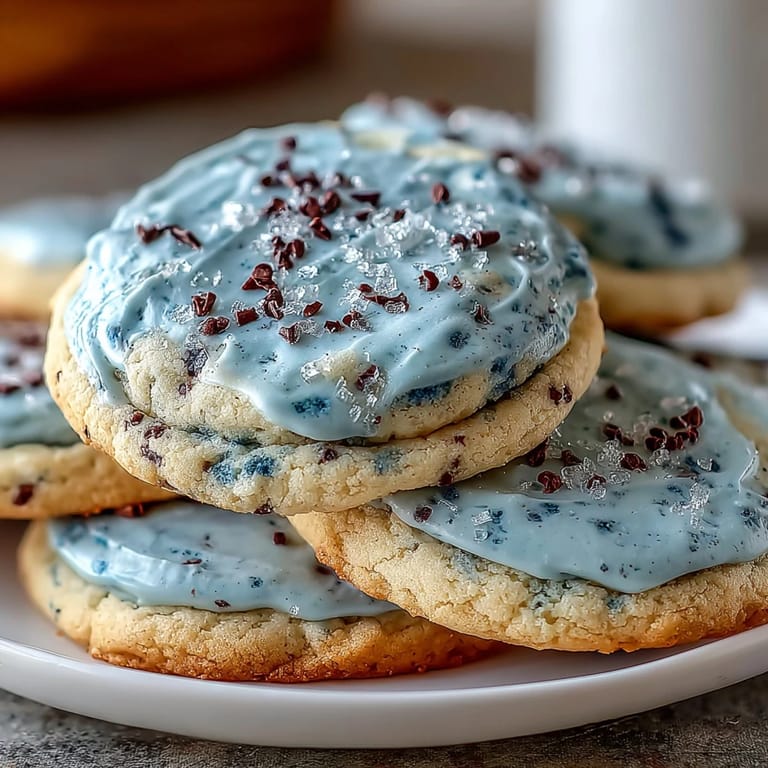
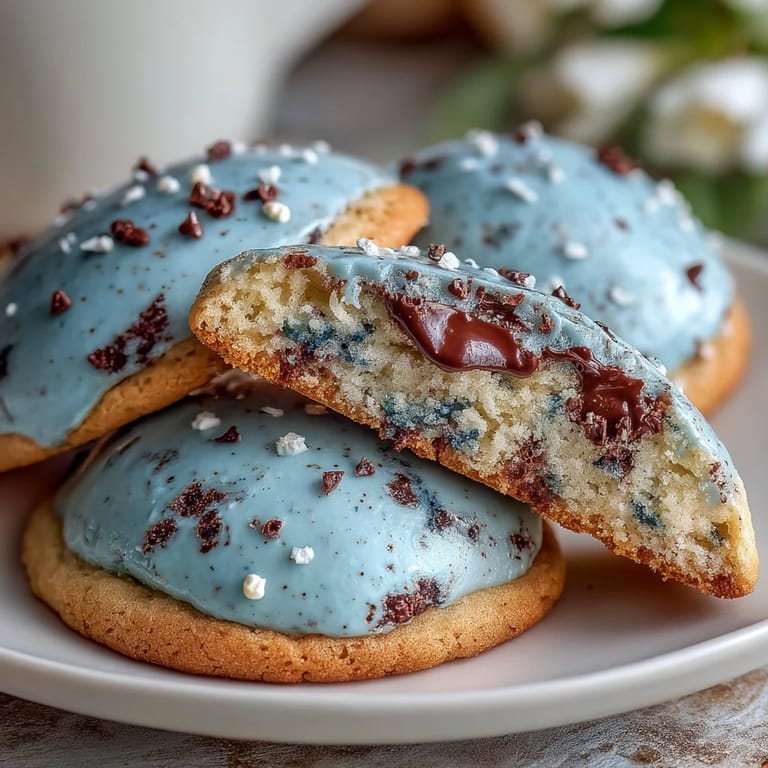
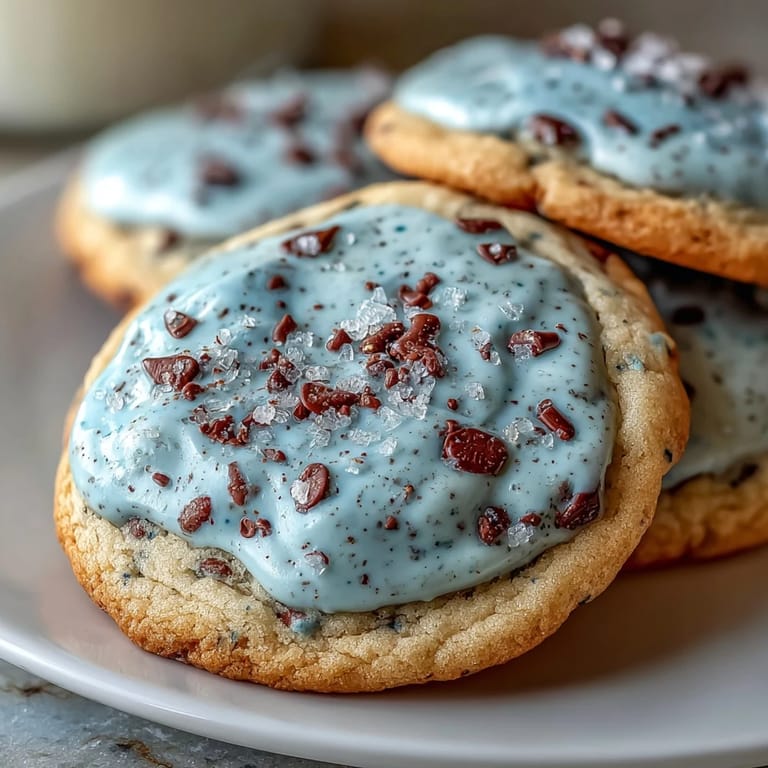
Save The gentle scent of vanilla wafted through my kitchen the first time I tested these spring cookies, mingling with the nervous excitement of trying to mimic the delicate speckle of a robin’s egg. A breeze nudged the curtains as I mixed dough tinted sky-blue, uncertain whether my aim for the perfect hue was ambitious or simply whimsical. There was something playful about flicking chocolate speckles across each iced cookie—a process I learned could get as messy as it was satisfying. Making these felt like a nod to spring, offering a bright spot after months of winter baking. Each batch became a small celebration of returning color, even if I left cocoa spots on the wall more than once.
One chilly April afternoon, I made these for a group of friends who were busy packing for a spring picnic. We chatted through dough kneading and laughed as someone accidentally speckled their jeans (which they declared “fashionable”). Watching everyone admire the pastel colors and delicate flecks made the kitchen feel festive, even before the cookies were cooled enough to eat.
Ingredients
- All-purpose flour: It gives structure without making the cookies too dense, and sifting prevents dry spots.
- Baking powder: Lifts the dough just enough for a tender bite—measure carefully for even results.
- Fine salt: Highlights the sweetness and rounds out flavors; kosher salt works if you adjust quantities.
- Unsalted butter: Starting with room temperature butter is key for creaming, creating that coveted melt-in-your-mouth crumb.
- Granulated sugar: Achieves crisp edges and enhances color; make sure it’s evenly combined with butter.
- Egg: Holds everything together and contributes to richness; fresher eggs yield brighter dough.
- Pure vanilla extract: For classic aroma—I've learned cheap extracts leave a medicinal aftertaste, so use the good stuff.
- Almond extract (optional): Subtle and nutty, but you can skip it to keep things simple for allergies.
- Blue gel food coloring: Gel is ideal because it tints intensively without watering down dough or icing; start with drops and adjust.
- Powdered sugar: Sifting smooths icing for that flawless egg finish.
- Milk: Just enough to loosen icing; add gradually to avoid runny results.
- Light corn syrup: Adds shine and helps the icing set with a gentle gloss.
- Cocoa powder: For realistic chocolate speckles; taste your mixture before flicking—if it's too bitter, adjust water or vanilla.
- Vanilla extract (for speckling): Rounds out cocoa flavor, helping the speckles taste as good as they look.
Tired of Takeout? 🥡
Get 10 meals you can make faster than delivery arrives. Seriously.
One email. No spam. Unsubscribe anytime.
Instructions
- Mix Dry Ingredients:
- Whisk together flour, baking powder, and salt until no lumps remain—you’ll notice a gentle powdery cloud as you combine them.
- Cream Butter and Sugar:
- Beat butter and sugar until pale and fluffy; the sound shifts as air is incorporated, signaling it's ready.
- Add Egg and Flavorings:
- Blend in the egg, vanilla, and optional almond extract, watching as the dough emulsifies and becomes glossy.
- Combine Dry with Wet:
- Add the dry mixture slowly, mixing just until the dough holds together—over-mixing can make cookies tough.
- Tint and Chill Dough:
- Drop in blue gel coloring, folding gently for a soft robin’s egg blue; wrap and refrigerate until firm, about 30 minutes.
- Prepare for Baking:
- Heat your oven to 350°F (175°C), line trays with parchment, and amaze yourself by rolling the chilled dough evenly.
- Cut Shapes:
- Press egg or oval cutters into the dough, transferring them to baking sheets spaced out—don’t worry if a few shapes are imperfect!
- Bake and Cool:
- Bake for 9–11 minutes, watching for set edges without browning; after cooling briefly, move cookies to a rack for full cooling.
- Make Royal Icing:
- Whisk powdered sugar, milk, corn syrup, and vanilla until glossy and smooth; tint to match your dough’s blue and adjust consistency as needed.
- Decorate Cookies:
- Spread or pipe icing onto cooled cookies, letting them dry for 15 minutes—if you’re impatient, they might smudge but still taste fantastic.
- Speckle the Eggs:
- Mix cocoa powder with water and vanilla until thin and dark; dip a stiff brush and carefully flick speckles over cookies (covering everything nearby is wise).
- Let Set and Store:
- Allow icing and speckling to dry completely before moving or storing, then enjoy, share, or squirrel a few away in an airtight container.
 Save
Save The day these cookies became a tradition was when my niece, elbow-deep in icing, started naming her speckled creations after birds she’d seen in the backyard. Suddenly, the kitchen was filled with laughter and stories instead of just baking, making the cookies feel like little tokens of spring.
Finding the Right Cookie Cutter
After several tries, I found oval cutters gave the most convincing egg shape—though a round cutter works in a pinch and still invites compliments. Using a gentle rocking motion makes for clean edges and prevents sticking. If you’re feeling creative, even freehand shapes work, bringing more personality to your batch. The trick is lightly flouring your cutter between presses so the dough keeps its form.
Messy Fun of Speckling
The speckling step quickly turns into a splash zone. I learned to set up a rimmed baking sheet and drape kitchen towels everywhere to keep chocolate flecks contained. Using a stiff paintbrush (or clean toothbrush) lets you control the splatter effect—too much water in the mix can make blobs instead of speckles. It’s oddly satisfying to see the eggs come to life in seconds, even if the aftermath means cleaning the cabinets.
How to Store and Share for Spring Events
Prepping these ahead is a breeze—cookies stay fresh longer than you’d expect if kept sealed. Stack layers gently separated with parchment and they’ll travel beautifully for parties or gifting. I like pairing a small bundle with a handwritten note for a cheerful touch.
- If you rush icing, cookies can stick together so patience is your best friend.
- Always sift powdered sugar for lump-free icing.
- Seal in a tin or airtight box for a week’s worth of springtime delight.
 Save
Save These cookies always bring a little joy to the table, even when things get messy. I hope your kitchen feels just as lively and full of spring spirit!
Recipe Guide
- → How do I achieve pale blue dough?
Add blue gel food coloring gradually to the dough and mix gently to reach your desired pastel shade.
- → What creates the speckled effect?
A mixture of cocoa powder, water, and vanilla is flicked onto iced cookies using a clean brush for the speckles.
- → Can I omit the almond extract?
Yes, the almond extract adds subtle flavor but is optional. Vanilla alone provides a classic taste.
- → How should I store these cookies?
Place cooled, iced cookies in an airtight container at room temperature to keep them fresh for up to one week.
- → What shapes work for these cookies?
Egg-shaped cookie cutters are traditional, but round or oval cutters also create beautiful spring cookies.
- → Are these suitable for vegetarians?
Yes, the cookies use dairy and egg, but are vegetarian as they contain no meat or gelatin ingredients.