 Save
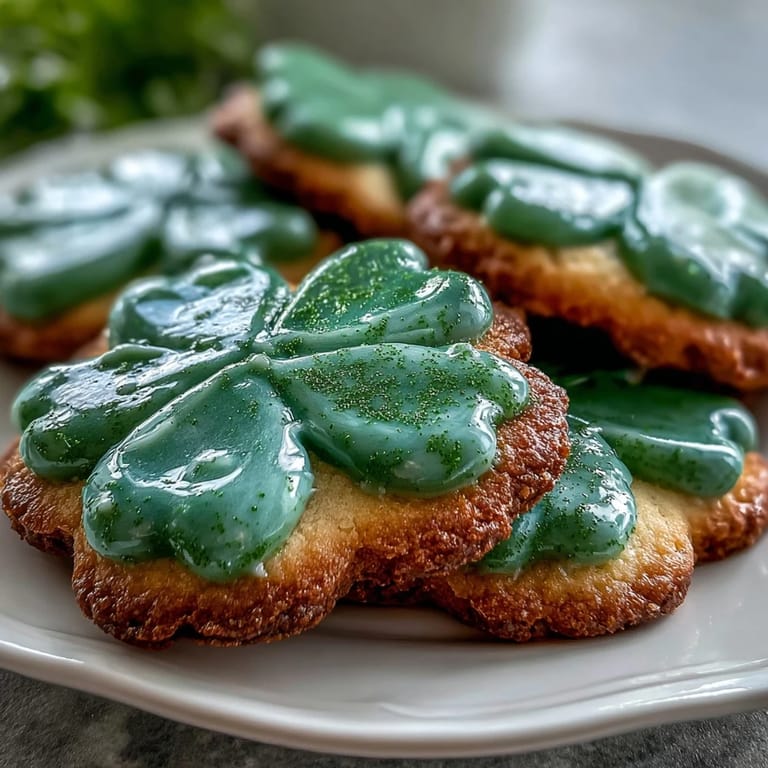
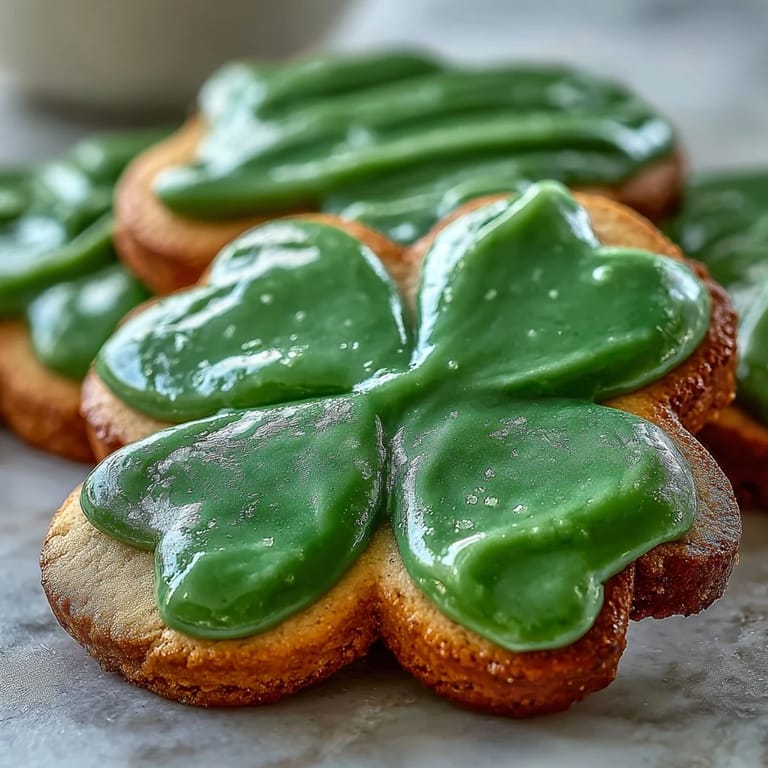
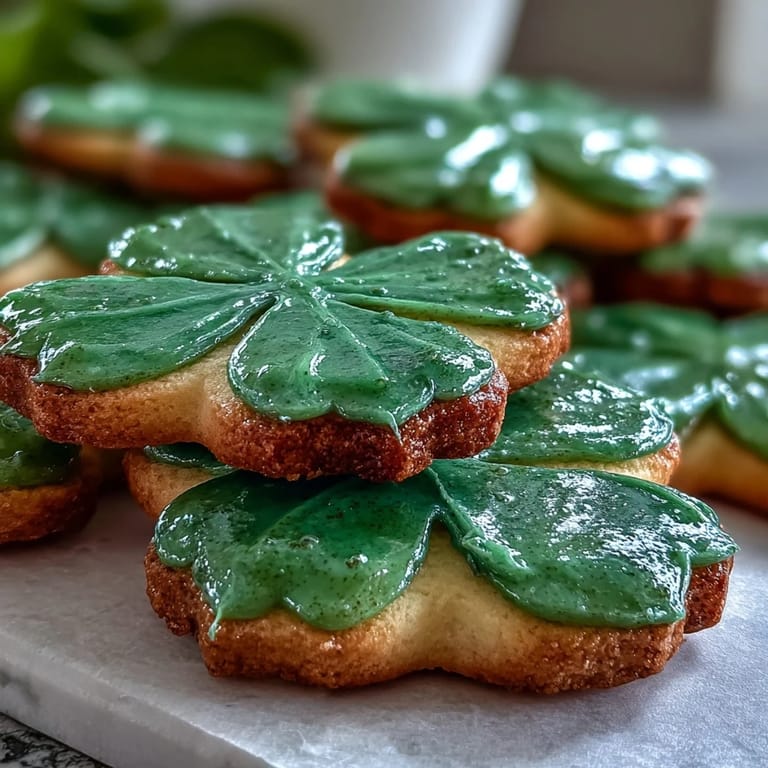
Save There's something magical about the way March rolls around and suddenly everyone wants to bake something green. My kitchen smelled like butter and vanilla last year when my niece insisted we make shamrock cookies for her school party, and I realized I'd been overthinking it the whole time—these are just buttery, tender sugar cookies that happen to be shaped like luck. The real joy is in the royal icing, that glossy, smooth frosting that turns into edible artwork under your fingers. Once you nail the technique, you'll find yourself making these not just for St. Patrick's Day, but for any celebration that needs a little festive charm.
I'll never forget pulling these cookies out of the oven while my sister stood at the counter with her phone, ready to photograph them for her Instagram. The edges had just started to turn golden, that perfect moment right before they go from tender to crispy, and the smell filled the whole house. She decorated them while I made coffee, and by the time we had them all iced and shimmering under the kitchen light, we both just stood there grinning like we'd accomplished something far more meaningful than cookies. That's when I understood these aren't just treats—they're tiny edible celebrations that bring people together.
Ingredients
- All-purpose flour (2 1/2 cups): This is your foundation—measure it correctly by spooning into your measuring cup and leveling off, because packing it down creates dense cookies that won't have that tender crumb you're after.
- Unsalted butter (3/4 cup, softened): Softened butter is non-negotiable here; if it's too cold, you'll spend ten minutes creaming it, and if it's melted, your dough becomes greasy and won't hold its shape when cut.
- Granulated sugar (1 cup): This sweetness carries the whole flavor profile, so don't skip it or try to substitute honey or maple syrup—the texture depends on granulated sugar specifically.
- Large egg (1): This binds everything and adds richness; make sure it's room temperature so it incorporates smoothly without creating lumps in your dough.
- Pure vanilla extract (2 teaspoons): The quality here matters because vanilla is one of only three flavors in the cookie dough itself, so don't grab that old bottle from the back of the cabinet.
- Almond extract (1/2 teaspoon, optional): This is my secret weapon—just a whisper of it adds a sophisticated sweetness that makes people pause and ask what that flavor is, but skip it entirely if tree nuts are a concern.
- Baking powder (1/2 teaspoon): This gives the cookies just enough lift so they're slightly cake-like rather than dense, creating the perfect texture for decorating.
- Salt (1/4 teaspoon): Never skip salt in sweet baking because it heightens all the other flavors and prevents the cookies from tasting flat or one-dimensional.
- Powdered sugar for icing (3 cups, sifted): Sift it before measuring—lumpy powdered sugar creates grainy icing, and that's the one thing that will ruin your beautiful finish.
- Egg whites (2 large) or meringue powder (4 tablespoons plus 6 tablespoons water): Egg whites create silkier icing, but meringue powder is safer if you're worried about raw eggs and tastes nearly identical once you add vanilla.
- Green gel food coloring: Gel coloring creates vibrant, true greens without watering down your icing the way liquid food coloring does, and a little goes such a long way that one bottle lasts forever.
Tired of Takeout? 🥡
Get 10 meals you can make faster than delivery arrives. Seriously.
One email. No spam. Unsubscribe anytime.
Instructions
- Mix your dry team:
- Whisk together the flour, baking powder, and salt in a medium bowl, creating an even blend so the leavening distributes throughout the dough. Set it aside and let it wait—this small step prevents lumps and ensures every cookie rises the same way.
- Cream butter and sugar into clouds:
- Beat the softened butter and sugar together for 2 to 3 minutes until the mixture looks pale, fluffy, and almost clouds-like in texture; this isn't just about mixing—you're aerating the butter, which creates tender cookies. Stop and scrape down the bowl halfway through because the bottom might still have unmixed sugar hiding there.
- Add the egg and extracts:
- Pour in the egg, vanilla extract, and almond extract if using, then mix until the dough looks smooth and homogenous. The mixture should be pale and cohesive—if it looks separated or curdled, beat it a bit longer until it comes together.
- Gently fold in the flour mixture:
- Add the dry ingredients to the butter mixture in one or two additions, mixing on low speed just until the flour disappears into the dough. Overmixing develops gluten, which makes cookies tough and chewy instead of tender and buttery, so stop as soon as you don't see any white streaks.
- Chill the dough:
- Divide the dough in half, shape each into a disk, wrap tightly in plastic wrap, and refrigerate for at least 1 hour—overnight is even better. Cold dough is easier to roll and cut cleanly, and it bakes into cookies with a better texture.
- Preheat and prepare your oven:
- Set the oven to 350°F (175°C) and line your baking sheets with parchment paper, which prevents sticking and creates an even heat surface for golden bottoms without burning.
- Roll and cut with intention:
- Remove one dough disk from the fridge, place it on a lightly floured surface, and roll it out to 1/4-inch thickness using even pressure with your rolling pin. Cut out shamrock shapes and place them on the prepared baking sheet, leaving about an inch between each cookie.
- Bake until edges whisper golden:
- Bake for 9 to 11 minutes—the centers should still look slightly underbaked while the edges just begin to turn golden, because they'll continue cooking slightly as they cool. Every oven is different, so watch them closely the first time and adjust timing if needed.
- Cool with patience:
- Let the cookies sit on the baking sheet for 5 minutes to firm up, then transfer them to a wire rack to cool completely before touching them. Trying to decorate warm cookies is like trying to write on wet paint—the icing won't adhere properly.
- Create your royal icing masterpiece:
- Beat together the powdered sugar, egg whites or meringue powder mixture, and vanilla or lemon juice on high speed for about 5 minutes until stiff peaks form and the icing looks glossy and smooth. The texture should be thick enough to hold peaks but fluid enough to pipe—if it's too thick, add a drop of water; if too thin, add a bit more powdered sugar.
- Tint your icing green:
- Divide the white icing into bowls and add gel food coloring drop by drop, stirring until you reach your desired shade of green—gel coloring is potent, so start with just a tiny amount. You can make multiple shades for dimension, from pale minty green to deep shamrock.
- Pipe with a steady hand:
- Transfer the icing to piping bags fitted with small round tips, then pipe an outline around each shamrock first, creating a border. Fill in the outlined area by piping back and forth or using a toothpick to spread the icing smoothly, creating that glossy, flooded effect.
- Let time do its work:
- Allow the icing to set for at least 1 hour at room temperature before serving or packaging the cookies. If you're in a hurry, you can pop them in the fridge, but room temperature setting creates that beautiful, smooth finish.
 Save
Save I think about the year my son carefully piped green icing onto a shamrock cookie, his tongue poking out slightly in concentration, and how he looked up at me with such pride when he finished. Those cookies ended up lopsided, the icing wasn't perfectly smooth, and honestly some of them were a bit wonky—but they were perfect because he made them. Now every St. Patrick's Day, he wants to bake these again, and I let him lead while I stay beside him, watching him become better and more confident each time.
Storage and Make-Ahead Magic
These cookies are incredibly forgiving when it comes to timing, which is one reason they became my go-to when I need to prep ahead. The undecorated baked cookies will keep in an airtight container at room temperature for up to five days, and the dough can be frozen in disks for up to three months—just let it thaw slightly before rolling. Royal icing made ahead is even better because it sets more evenly; you can make it up to two days in advance and keep it covered at room temperature, stirring before you use it again.
Flavor Variations Worth Exploring
Once you've mastered the basic green shamrocks, you'll start seeing possibilities everywhere. The almond extract is subtle enough that it hides in the background, but increasing it to a full teaspoon creates a much more pronounced marzipan-like flavor that some people absolutely crave. Lemon juice in the icing instead of vanilla creates a brighter, more springlike finish that tastes incredible with the buttery cookies, and it's my choice whenever I want something that feels less traditionally sweet and more interesting.
The Icing Technique That Changes Everything
I spent the first three years making these cookies thinking I was doing the icing wrong because it never looked smooth and glossy like the pictures online. Then someone showed me that the trick isn't in the mixing or the piping—it's in understanding that royal icing has different consistencies for different purposes. Outline consistency is thicker so it holds its shape and creates a dam around your shamrock, while flood consistency is thinner and flows into that outlined area, creating that beautiful smooth surface when it dries.
- Outline icing should hold peaks when you lift the whisk, thick enough to pipe a clean border that won't spread.
- Flood icing should be thin enough to flow and settle smoothly, loose enough to work with a toothpick but not so thin it runs off the cookie.
- Practice piping a few test shamrocks on parchment paper to get the feel before decorating your actual cookies.
 Save
Save These shamrock cookies have become part of how my family marks the turning of seasons, a little edible reminder that spring is coming and celebrations are worth the extra effort. Bake them for yourself, for people you love, or just because a Tuesday afternoon needs something beautiful and buttery—either way, you're creating small moments of joy.
Recipe Guide
- → What is the best way to achieve a smooth royal icing finish?
Whip the icing until stiff peaks form and achieve a glossy texture. Use small round piping tips to outline and flood the shapes, allowing it to set fully for a polished finish.
- → How should I prepare the dough for clean shamrock shapes?
Chill the dough wrapped in plastic for at least an hour to firm it up. Roll on a lightly floured surface to even thickness before cutting shapes to maintain crisp edges during baking.
- → Can I substitute ingredients for dietary needs?
Yes, use a flax egg for a vegan option and choose a vegan royal icing alternative. Omitting almond extract helps avoid nut allergens without compromising texture.
- → How long can decorated cookies be stored?
Store in an airtight container at room temperature for up to 2 days to maintain freshness. Royal icing may be prepared ahead and kept covered similarly.
- → Why is it important to cool cookies completely before decorating?
Cooling prevents the icing from melting or sliding off, ensuring the decoration sets properly and keeps its glossy appearance.
- → What gives these cookies their subtle flavor notes?
Vanilla extract provides the main flavor, complemented by optional almond extract which adds a delicate nutty hint for enhanced complexity.