 Save
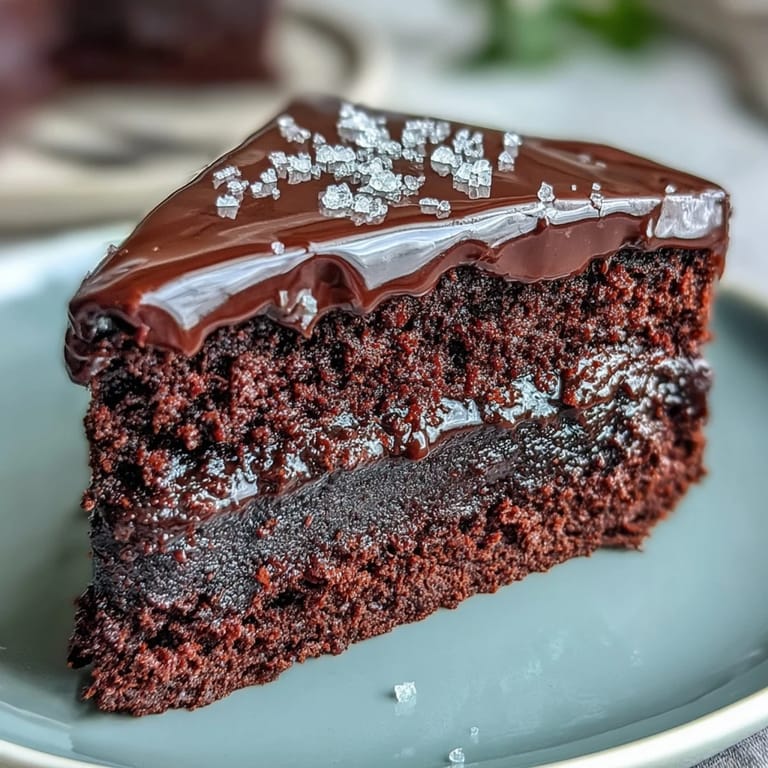
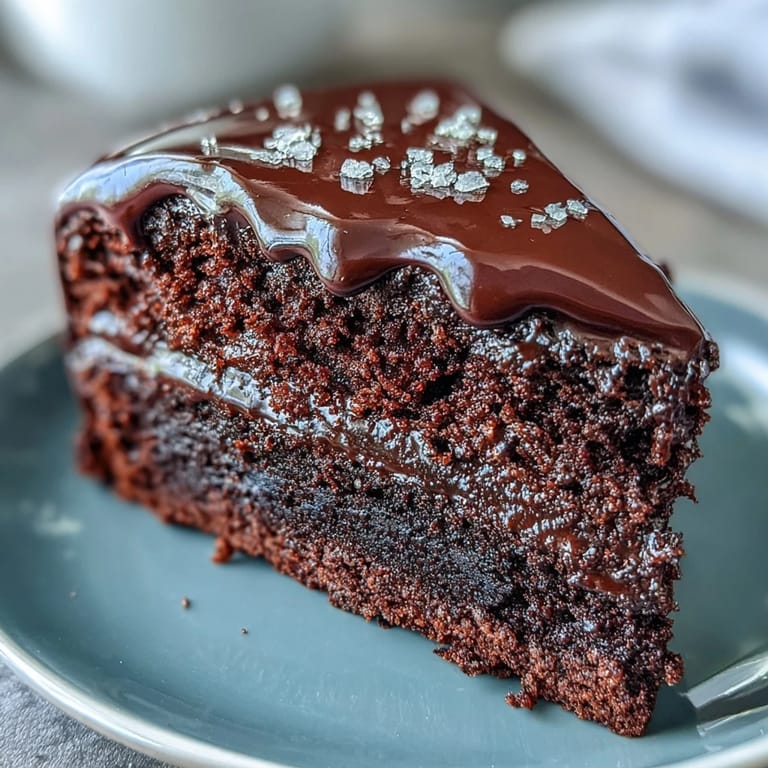
Save There's something about the smell of melting chocolate that makes you forget you're supposed to be calm in the kitchen. I learned this the hard way one rainy afternoon when I decided to make this cake for a friend's surprise birthday gathering, and within minutes, my entire flat smelled like a chocolatier's dream. The cake itself is wonderfully forgiving—squidgy in the center, reliable, and honestly, it doesn't need much fussing to impress people.
I once brought this cake to an office potluck where everyone expected store-bought contributions, and watching people's faces when they realized it was homemade felt better than any compliment. One colleague actually went quiet mid-conversation, fork in hand, which is the highest form of cake praise I've ever received.
Ingredients
- Unsalted butter (200 g for the cake, 100 g for the icing): Butter is your foundation here—it carries the chocolate flavor and creates that tender crumb, so don't skip it or substitute with oil.
- Dark chocolate (50% cocoa solids minimum, 150 g chopped for cake, 150 g for icing): The quality matters more than you'd think; cheaper chocolate can taste waxy, so invest in something you'd actually enjoy eating on its own.
- Light brown sugar (250 g): Brown sugar adds depth and moisture compared to white, keeping the cake squidgy rather than dry.
- Eggs (3 large): Room temperature eggs incorporate more smoothly into the mixture, creating a better texture.
- Plain flour (200 g): Sift it even if you think you don't need to—it aerates and prevents lumps in the batter.
- Baking powder (1 ½ tsp) and fine sea salt (¼ tsp): These balance the richness and help the cake rise evenly without any metallic aftertaste.
- Cocoa powder (50 g): Sift this separately with the flour to avoid clumpy pockets of concentrated cocoa.
- Whole milk (150 ml for cake, 3 tbsp for icing): Whole milk creates a moister crumb than alternatives; the fat content matters.
- Vanilla extract (1 tsp): A small but essential touch that rounds out the chocolate flavors instead of making them one-note.
- Icing sugar (200 g, sifted): Always sift before adding to avoid lumps in your icing, which will make it grainy no matter how much you beat it.
Tired of Takeout? 🥡
Get 10 meals you can make faster than delivery arrives. Seriously.
One email. No spam. Unsubscribe anytime.
Instructions
- Get your oven ready and prep the tins:
- Preheat to 180°C (160°C fan) and grease two 20 cm round tins thoroughly, then line the bottoms with baking paper so the cakes don't stick. This step feels tedious but saves real heartbreak when you're turning out a finished cake.
- Melt the chocolate and butter together:
- Use a heatproof bowl over simmering water, stirring occasionally until completely smooth and glossy—don't let the water touch the bowl or you'll seize the chocolate. Once melted, pull it off the heat and let it cool for a minute while you move on.
- Whisk the sugar and eggs until pale:
- This is where an electric whisk saves your arm, though a hand whisk works if you're determined; you're looking for the mixture to roughly double in volume and turn a pale, mousse-like color. This incorporation of air is what keeps the cake from being dense.
- Fold in the chocolate and vanilla:
- Stir the cooled chocolate mixture gently into the eggs, then add the vanilla extract—don't overthink this part, just make sure it's evenly combined.
- Sift and fold in the dry ingredients:
- Sift the flour, baking powder, salt, and cocoa powder together into a bowl, then gradually fold these into the wet mixture while alternating with splashes of milk. This gentle folding keeps the batter light rather than overworked and heavy.
- Divide between the tins and bake:
- Pour the batter evenly into both tins and smooth the tops, then bake for 30–35 minutes—the cake should look just-set on top but still have a slight jiggle in the center. A skewer inserted should come out with a few moist crumbs, not totally clean.
- Cool completely before icing:
- Let the cakes rest in their tins for 10 minutes, then turn them out onto a wire rack—rushing this step risks them breaking apart. Once completely cool, they're ready for the glossy chocolate coat.
- Make the icing smooth and glossy:
- Melt the chocolate and butter together over simmering water, then gradually beat in the sifted icing sugar and milk until you reach a spreadable, glossy consistency. If it's too thick, add a touch more milk; too thin, add a pinch more icing sugar.
- Assemble and coat:
- Place one cake layer on your serving plate, spread a third of the icing across the top, then place the second layer on top and coat the top and sides with the remaining icing. A palette knife warmed under hot water helps smooth it into that bakery-quality finish.
 Save
Save There's a moment when you smooth that final layer of glossy chocolate icing across the top of the assembled cake where you genuinely feel like a baker, even if you've never owned a piping bag. This cake has this quiet confidence to it—it looks restaurant-quality but asks almost nothing of you in return.
Why This Cake Works Every Time
The real magic here is the ratio of chocolate to structure—you've got enough cocoa to make it deeply chocolatey without being bitter, and the brown sugar keeps things moist without making the cake feel cloying. The alternating of dry ingredients with milk is a technique I've borrowed countless times now because it genuinely produces a smoother, more tender crumb than just dumping everything in at once.
Making It Your Own
While the cake is perfect as written, it's also a gracious base for improvisation—a layer of raspberry jam between the cakes adds tartness that cuts through the richness beautifully, or you could dust the finished cake with cocoa powder for a professional-looking touch. I've also brushed the cooled cake layers with a touch of coffee liqueur or added a pinch of espresso powder to the cocoa mixture, which deepens the chocolate flavor in a way that's subtle but noticeable.
Storage and Serving
This cake actually improves slightly after a day, once the flavors have settled and mellowed together—store it in an airtight container at room temperature and it keeps perfectly for three days. When you serve it, a dollop of whipped cream or a handful of fresh berries on the side brings brightness and prevents the whole plate from feeling too heavy, which is the kindest thing you can do for people eating cake after a meal.
- Serve slices at room temperature rather than cold, so the chocolate flavor isn't muted.
- If the icing cracks slightly when slicing, use a hot, wet knife and wipe it clean between cuts.
- Leftovers taste just as good cold from the fridge, though the icing will be firmer.
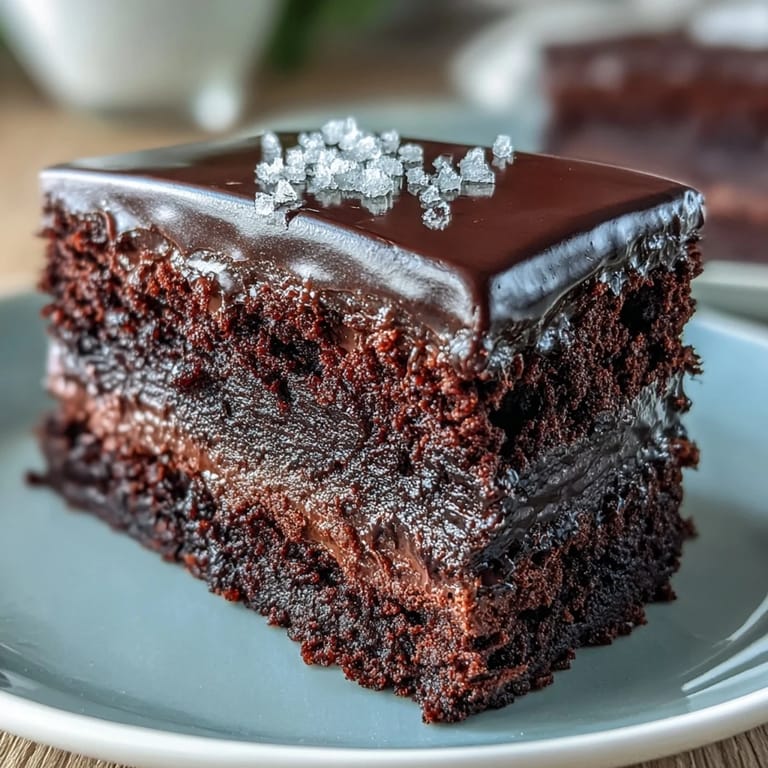 Save
Save This cake is one of those rare recipes that feels generous to make—it comes together quickly, looks impressive, and genuinely tastes like you put far more effort in than you actually did. Keep it in your back pocket for whenever you need something reliable that makes people happy.
Recipe Guide
- → Can I use milk chocolate instead of dark chocolate?
Yes, but the cake will be sweeter and less rich. Dark chocolate with at least 50% cocoa solids provides the best depth of flavor and balance for this fudge cake.
- → How do I know when the cake is properly baked?
Insert a skewer into the center—it should come out with a few moist crumbs attached, not wet batter. The cake should also spring back lightly when touched and pull away slightly from the tin edges.
- → Can I make this cake in advance?
Absolutely. The cake actually improves after a day as the flavors develop. Store in an airtight container at room temperature for up to 3 days, or freeze un-iced layers for up to 3 months.
- → What can I add between the cake layers?
Raspberry jam works beautifully with chocolate, or try buttercream, chocolate ganache, or even a layer of whipped cream mixed with crushed berries for added flavor contrast.
- → Why is my icing too runny or too thick?
Temperature is key. If too runny, let it cool and thicken slightly before spreading. If too thick, add a splash more milk. The icing should be smooth, glossy, and spreadable but hold its shape.
- → Can I make this as a single layer or traybake?
Yes. Use a 23cm square tin or 25cm round tin for a single layer, adjusting baking time to 40-45 minutes. For a traybake, use a large rectangular tin and reduce time to 25-30 minutes.